I am assuming here that an Email Template has already been created.
1. Login to management centre and select “Marketing” option
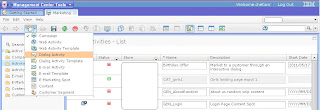
3. Select “New dialog activity” option
4. Select the “Blank Dialog Activity” template and click “OK”
5. In the new dialog activity screen, Fill in the required information like the name of the activity, description etc., and then select and drag the “Wait for Event” from the “Triggers” column and place it in the activity flow.
6. Configure the event for a wish list as detailed out below
The activity configuration has the following parameters.
- Event Name – The event name would be the command name that is executed when customer adds an item to the wish list. In this case, it is “AjaxInterestItemAdd”
- Number of Event Parameter – This will define the number of condition parameters on which the event will trigger. For example if you want the event to trigger for a particular item added to wish list then specify the parameter name and value as described in the next two steps.
- Parameter name – This is a condition parameter name. If a wish list email has to trigger based on an item then specify the parameter as “catEntryId”. If left blank, then it applies to all.
- Parameter value – This is the value of the parameter name specified in the previous step. In this case, it can be a particular item id.
- Times – This defines the number of times the event must have occurred for a given customer for the activity to start / continue.
- Time frame – This defines the time frame within which the event has occurred.
- Days (only applicable when you select certain options in the previous step) – specifies the number of days within which the event has occurred.
7. Associate the Action when the trigger fires. In this case, it is the Send Email Action. Associate an email template to the activity.
In my next post, I will show how to activate a Dialog Activity


No comments:
Post a Comment